Tampilkan postingan dengan label Tips Windows. Tampilkan semua postingan

Membuat Partisi Harddisk di Windows Vista

Tidak seperti pada Windows XP yang memerlukan software lain untuk membuat partisi harddisk semisal Partition Magic, pada Windows Vista tidak diperlukan lagi software tambahan.


Kita tinggal langsung masuk ke Computer Management, kemudian pilih Storage --> Disk Management, dan klik kanan pada drive yang akan dipartisi.
Urutan lengkapnya diuraikan berikut ini :


• Untuk masuk ke Computer Management, Klik Start --> klik kanan pada menu Computer --> pilih Manage


Maka akan tampil jendela Computer Management.

• Pada Jendela komputer Management, klik Storage, --> Disk Management
Klik kanan pada hardisk yang akan dipartisi --> Pilih Shrink Volume


• Kemudian akan tampil jendela yang menginformasikan kapasitas hardisk, maksimal shrink yang boleh dibuat, dan kolom pilihan besar shrink yang kita inginkan, dalam ukuran Mega Byte, kalau anda bingung dengan angka-angka ini, biarkan saja, kemudian klik Shrink. Proses Shrink segera berlangsung tanpa mengganggu/menghapus) program/aplikasi atau data-data anda.


Setelah proses selesai, maka akan ada tampilan Unallocated partition.


• Kemudian untuk membuat Volume / drive baru, klik kanan pada unallocated--> pilih New Simple Volume --> Next --> Tentukan ukuran volume yang diinginkan, kalau bingung dengan angkanya biarkan saja --> Klik Next --> Next
• Pada jendela Format Partition kalau ingin proses lebih cepat pilih Perform a quick format --> klik Next

• Setelah beberapa saat akan tampil jendela yang menyatakan proses selesai klik Finish
• Cek di Menu Computer untuk melihat drive baru.

Mengubah Taskbar Windows XP menjadi Seperti Windows 7

Dinamis Window Thumbnail
Kita cenderung untuk merespon lebih baik daripada gambar untuk menulis. ViGlance (panas edition) menambahkan jendela baru thumbnail memberikan fitur yang "up-to-date" jendela pratinjau. The "up-to-date" sistem akan mencoba untuk memberikan yang terbaru snapshot dari jendela, sementara pemrosesan menggunakan daya minimal.

Pin applikasi favourit kamu

Pintas melampirkan program langsung ke taskbar sehingga Anda dapat membuka program yang paling
sering digunakan tanpa browsing menu Start. Bila aplikasi dibuka maka item merujuk pada aplikasi yang telah dibuka.

Mulai 7 orbit replika
Mulai tombol di dalam Windows XP ini sangat tidak cantik, dan terlalu besar dan mengerikan Ugly Shade of Green. ViGlance menggantikan horrible besar yang mulai dengan tombol yang kecil dan efisien mulai orbit. Sementara pada saat yang sama memberikan sebuah Smooth mengalum Gulirkan efek seperti Windows 7.


Customisasi Applicasi Positions
Sekarang Anda dapat mengatur kembali ke taskbar sesuai dengan ViGlance oleh staf perference seret dan menurun item ke posisi yang Anda inginkan. Pinned barang pesanan akan selalu diingat dan digunakan setiap kali Anda membuka ViGlance.

Download

Instalasi Windows XP Melalui USB Flash Disk

Salah satu masalah yang timbul akibat ketidaktersediaan optical drive/CD-ROM/CD-RW pada subnotebook/PC adalah kesulitan saat hendak melakukan instalasi aplikasi ataupun sistem operasi. Tak jarang pengguna harus menyalin aplikasi atau sistem operasi yang hendak di-install ke dalam USB flash disk, atau mencolok external optical drive dan melakukan instalasi seperti biasa. Namun, tentu saja hal ini sangat merepotkan, mengingat tak banyak pengguna awam yang mengetahui prosedur instalasi aplikasi atau sistem operasi via flash disk, dan harga sebuah external optical drive yang tidak murah.

Contoh kasus, andaikan kita hendak mengganti sistem operasi Xandros Linux yang terpasang di subnotebook Asus Eee PC dengan Windows XP, maka kita harus menginstal via external optical drive. Mungkin tak terlalu memusingkan bagi Anda yang punya cukup dana untuk membeli sebuah external optical drive, namun bagaimana dengan Anda yang sejak awal ingin berhemat dengan membeli subnotebook?

Nah, lewat artikel ini penulis ingin berbagi tips membuat modul instalasi Windows XP menggunakan media USB flash disk, yang tentunya akan menghemat biaya dan menjadikan pembaca lebih pintar. Modul instalasi ini tak hanya dapat diimplementasikan dalam instalasi ke subnotebook saja, tapi juga dapat diaplikasikan pada komputer mana pun yang sudah memiliki fitur untuk booting via USB.

“Gampang! Tinggal salin file instalasi Windows XP ke flash disk!” Mungkin itu yang terlintas di benak Anda, tapi percayalah bahwa membuat modul instalasi Windows XP tidak semudah itu. Namun jangan khawatir, karena dengan mengikuti langkah-langkah berikut, proses pembuatan modul instalasi Windows XP pun tak terlalu sulit dilakukan.

Peralatan Yang Harus Disiapkan:

  1. Sebuah komputer yang dilengkapi optical drive (CD atau DVD) dan port USB yang dapat bekerja dengan baik.
  2. Sebuah USB flash disk berkapasitas 1 atau 2 GB.
  3. CD instalasi Windows XP.
  4. Aplikasi pembuat modul instalasi (USB_PREP8 dan PEtoUSB) yang dapat diunduh cuma-cuma melalui link http://www.sendspace.com/file/7n781n

Langkah-langkah Pembuatan:

  1. Tancapkan USB flash disk ke salah satu port USB. Ingat-ingat posisi drive-nya. Apakah F:, G:, H:, dan sebagainya.
  2. Saat Anda berada di posisi normal (desktop), masukkan CD instalasi Windows XP ke optical drive. Jika komputer menjalankan proses instalasi secara otomatis, batalkan saja dan tutup semua aplikasi yang tengah berjalan.
  3. Unduh dan ekstrak aplikasi yang penulis berikan. Saran penulis, ekstrak seluruh isinya ke sebuah folder, semisal C:\USB.
  4. Selanjutnya, buka folder di mana Anda mengekstrak aplikasi modul pembuat instalasi, kali ini kita ambil contoh C:\USB.
  5. Jalankan file bernama “usb_prep8.bat” maka di layar monitor akan tampak jendela Command Prompt berisi macam-macam perintah. Jika sudah muncul tulisan “Press any key to continue,” tekan sembarang tombol untuk konfirmasi.
  6. Di layar akan muncul jendela PEtoUSB yang meminta Anda memformat USB flash disk Anda. Tak perlu mengubah setting apa pun, langsung klik Start untuk mulai proses format. Jawab konfirmasi sesuai kebutuhan Anda.
  7. Jika sudah selesai, tutup jendela PEtoUSB (jangan menutup jendela Command Prompt yang tadi terbuka ketika Anda menjalankan usb_prep8.bat), maka di layar akan muncul opsi-opsi dari 0 hingga 5.
  8. Gunakan opsi 1 untuk memilih sumber file instalasi yang nantinya akan disalin ke flash disk. Disini, tentukan di drive mana Anda menyimpan instalasi Windows XP. Pilih saja optical drive di mana sudah ada CD Windows XP di dalamnya, atau pilih folder pilihan Anda jika Anda telah menyalin file instalasi Windows XP ke folder tertentu.
  9. Pilih opsi 3 untuk menentukan di mana Anda mencolok flash disk. Kalau flash disk Anda berada di drive F:, maka ketik F dan tekan ENTER. Jika drive G: maka ketik G dan tekan ENTER, begitu seterusnya berlaku untuk drive lain.
  10. Selanjutnya pilih opsi 4 untuk mulai proses pembuatan modul instalasi yang nantinya akan disalin ke flash disk secara otomatis. Jawab apa pun konfirmasi yang muncul dengan Y atau YES atau OK atau bentuk persetujuan lain.

Selesai! Kini flash disk Anda telah siap digunakan untuk instalasi Windows XP! Silahkan melakukan setting pada BIOS subnotebook Anda, dan pilih Removeable Disk (atau apa pun nama lainnya) sebagai media pertama yang dijalankan saat booting.

Mengingat teknik instalasi semacam ini juga tersedia di internet, Anda juga bisa mencarinya via mesin cari. Selamat mencoba…!

Install Windows from USB FlashDisk

This idea began when you want to install Windows on the notebook. Because the notebook does not have a CD-ROM, InfoKomputer must use an external CD-ROM. Then thought, what if the installation process using a flash? Solution is clearly more practical and inexpensive, because we do not have to buy an external CD-ROM, and only use the USB flash disk that are affordable.

However, to do this, we can not just put the files from the Windows installer CD to flash disk. We have to make is known as flash bootdisk first. One thing that the BIOS is also crucial in the notebook / netbook / PC we will install should support booting through the flash disk. In fact nearly all the new products already support it, but we suggest you check the BIOS of your PC first.

If you can, the following is a list of completeness you need.
1. A PC with a CD-ROM (for the process of preparation and file transfer)
2. Windows XP installer CD or Vista
3. Application support form (available in three DVD editions InfoKomputer February):
a. USB_PREP8
b. PeToUSB
c. Bootsect.exe
4. Flash disk with a capacity of at least 1GB

Here's how to enter in to the Windows installer flash disk.

1. PeToUSB.exe to copy the files in the folder USB_prep8.
2. Run the file usb_prep8.cmd with the double click. The file is located in the folder USB_Prep8. Note: If your PC using Windows XP2, you need to unblock the file to be run. How, right-click> Properties> Unblock
3. Later file a window will appear like the picture below.
4. Press Enter, and a window will appear.
5. Leave all the settings in the default (unless you want to change the drive label) and press Start. This akan menformat your flash disk, so make sure no important files on the flash disk.
6. Once the process is completed, DO NOT close the window PeToUSB. Leave it open.
7. Open the command prompt (caranye click Start> Run> cmd). At the command prompt panel, go to the folder where the file is saved bootsect.exe. Way, type "cd namafolder". For example, because bootsect.exe files in the folder bootsect located on the desktop, we type "cd desktop" and then "cd bootsect" (both without quotes).
8. If bootsect.exe already met, type "bootsect.exe / nt52 X:" (without quotation marks). Note: X: drive to show your flash disk, so first find out the name of the drive. On our case, the name of L so that the drive is the command to "bootsect.exe / nt52 L:"
9. If step 9 is done correctly, a message will appear "Bootcode was successfully updated on all Targeted volumes." Close the window and command window PeToUSB. note: do not close the window USB_Prep8. USB_Prep8 window should remain open.
10. When you close the window PeToUSB, USB_Prep8 in the window will automatically appear as menu options under the picture. If not, try and press Enter.
11. At this stage, you actually just do the settings for Prep8, free way is to select the menu based on the number. You must change are:
a. Menu 1: select the drive where Windows XP (or your CD-ROM). I click on 1, will be out later Explorer to select the drive. Select the name of the drive (the PC is C).
b. Menu 2: Virtual TempDrive choose, or a virtual drive in your PC hard drive as a place to store data (before moved to the flash disk). Select the drive that is not in your PC, eg drive T.
c. Menu 3: to choose your flash disk drive. Press 3 and select the flash disk drive that you want to enter Windows.
d. Menu 4: the menu to run the next process. If you have run the 1 to 3, you immediately run this menu 4.
12. Nanti akan pop-up window that will immediately delete the temporary drive (which we do in the menu 2). Press Yes.
13. After that, the file transfer process to run the Windows installer. There are two processes going on in here. First transfer files from a CD-ROM to hard disk, and the second from the hard disk to flash. The length depends on the speed CD-ROM or flash, and in our case about 30 minutes.
14. After that, we live Plug flash disk to the PC we will install, and set the booting priority to the flash disk. When switched on, there are two options available. Select option number 1 (TXT Mode Setup Windows XP).

After that, the installation process is running as normal, including the process re-booting. No you need to do here, just wait until the installation process is complete. To note is the flash disk can not be revoked until the process is complete (already signed in Windows).

Well, now the Windows installation can be done even though you do not have a CD-ROM. very practical!

Re-install the Operating System With Fast

Re-install the operating system might often be done by many computer users. When the computer it is already "lemot" because of the many things that are not important, can be re-install it.

Installing the operating system does not take a moment. waiting time of 30 minutes - 1 hour. The length depends on the installation of hardware (read: processors, memory, and disk) that is used.

Actually reinstall the operating system does not always have to run so long. Do with the cloning of the disk, we need not be through a lengthy installation process. ita just need to copy the results of cloning and the PC is operating bersistem again. So that the results of cloning as an operating system that is still fresh, do cloning shortly after you finish to install the operating system and drivers. Other programs should not be installed.

The core of the hard disk cloning is copying the entire hard drive contents to other media - to be another hard disk, CD, DVD, or external hard drive. With cloning, you will get the contents of the CD-R with the exact content of hard disks.

We need to do some parangkat cloning. First is the software for cloning. One is that you can use Norton Ghost from Symantec. We also need a CD-writer, CD start-up, and 2 floppy diskette 1, 44 MB.

Save to CD
Since we will be doing the cloning of the operating system, the drive that contains the operating system that will dikloning - usually drive C. But, I can only operating system on another drive, for example, because there is more than one operating system in a PC.

On this tutorial, do pcplus want cloning of the C drive that contains the Windows operating system with the size of the partition of 400 MB.

let's start.
  1. Run Norton Ghost by clicking the [Start]> [Program]> [Norton Ghost] [Norton Ghost].
  2. You will see the view Ghost Basic. Select the first option, the [Backup].
  3. Click [Next].
  4. Select the Source option in the select drive C. Destination in the options select [Recordable CD or DVD]. After that, click [Next]> [OK].
  5. Press the [Next], [Next] again, [Next] again. Then click [Continue], click [Run Now], and finally click [OK].
Windows will restart and Norton Ghost to do any back-up. Now you have 1 CD that is the image of your C drive. The contents of the CD is only 1 file that berekstensi GHO. You can not see the contents of the file without assistance Ghost Explorer. With the help of Ghost explorer, you can view the files on the file in the GHO.

I Start-up Disk
We need a floppy start-up results so that the GHO image file can be used when we want to "re-install" the operating system. Start-up disk is a two 1.44 MB floppy diskette. We call the first diskette "floppy A", while the second disk we call the "floppy B".

Run Norton Ghost and click [Ghost Utilities]> [Norton Ghost boot wizard] [CD / DVD startup disk with ghost] [Next]> [Use PC-DOS] [Next] [Next] [Next]> [Next]> [OK]. Insert blank floppy disks to make CD / DVD start-up. Press [Start] to make a format disk, then press [Close].

Next will be a floppy start-up disk. When the confirmation to enter the second disk appears, remove and insert a floppy diskette B. Press [Start] to do the format and press [Close]. Wait until the process is finished, and press [Finish] to end.

Now you have a startup floppy disk 2. This diskette that will be used for booting the first time. Note that the second disk is related to one another. A diskette can not be run without the disk B, so is vice versa. B diskette can not be run without the floppy A.

"Install"
Why install it be in quotes? That's because we do not install the operating system. But, just copy the operating system that we installed previously.

Step by step this is done when we want to re-invigorate the operating system. We are doing is cloning from CD to hard disk.

In the BIOS, so that the Set is made from boot floppy diskette. Insert a floppy in the floppy drive. Follow the instructions on the monitor, if you are inserting floppy B, then enter the diskette B. You are prompted to insert a floppy and press return [Enter], and the last return you are required to enter the disk B.
Now you have entered a Norton Ghost.

To perform cloning from a CD to the hard drive, select [Local]> [Partition]> [from image]. Navigate to the CD-ROM containing the GHO file, and press [Open]. In the "Select source partition from image file", click [OK]. Then in the "Select local destination drive by clicking on the drive number", click [OK]. Select the drive that will be in the cloning, select drive C, press [OK] and press [Yes].

Cloning will run until reaching 100 percent. Press [Reset computer] to restart. Remove the diskette from the floppy drive and the BIOS Arrange to take your first booting from the hard disk.

Make your PC / Computer Fast

Sometimes the pc both with windows xp and vista to be slow even very slow. This can be due to many of them because the virus, often go out the program or install and uninstall, spyware, error due to change any settings correctly, and so, well at this time if you include the one that felt the symptoms above, the computer is very slow and even slower so at this time there is free software that can make a pliers PC / computer that is faster Advanced WindowsCare is the program to track the error on the PC at the same time improve it so that the result will make a faster PC / your computer, Advanced WindowsCare has several advantages, including:

* Free is a freeware or
* Includes spyware scanning
* Fix the registry error
* System Optimization in the windows
* Control and Optimize Windows startup
* Eliminate waste files
* Scan the system can be done quickly

And many more advantages, so too bad if we do not take advantage of this free software facilities

Changing Pirated Windows XP Windows Being Genuine (original)

Perhaps the most windows XP users in India using pirated Windows XP. But it does not mean pirated Windows XP is not genuine (GENUINE).

Distinguish the original Windows XP or not in fact located on the serial number that is used when the process of installing Windows XP.

To test whether our original windows XP, try using the tool "Microsoft Genuine Advantage Diagnostic Tool", which can mendetaksi authenticity of your Windows XP, for example, I use windows but use pirated serial number is so genuine, the tool "Microsoft Genuine Advantage Diagnostic Tool" when you windows xp that a cave is Original, this evidence:

Download logitcheck here

This process can run to 10 minutes depending on connection internya. if there are in the process of validation is not passed or the original windows do not usually have to pay the $ 149 price 1jutaan about it, so this time I change the Windows Genuine become authentic, and not to be charged $ 149 for the purchase of microsoft by serial number.

If it turns out the windows XP that we use is not genuine, so I need to worry. I can have windows Xp serial number which is evidently genuine: Please download here.

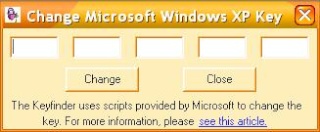
But our problem is what lazy to re-windows, use the application made Jelly Bean Keyfinder can change the serial number for windows Xp, so I need to hard re-install windows so we. Download Keyfinder here

Click Options, then enter Key its validation then restart your computer.

This article does not guarantee you a free Windows Secrets from the general public may look like lisesnsi every secret but the views not only windowsnya only. But the sticker on your PC / Laptop does not match with that found in the Software. So please do not pass can lunge secret pirated windows.

Once completed please ceck its validation with logitceck. result like this:


Please try, hopefully this article can be useful for you.

Cara me-repair (memperbaiki) Installasi Windows XP

Repair windows XP

Ada kalanya pengguna komputer mengalami masalah dengan Windows atau sistemnya. Terkadang muncul masalah serius yang menyebabkan komputer tidak bisa booting atau file-file sistem windows rusak akibat virus. Jika ini terjadi biasanya ada dua pilihan: Install Ulang atau Repair Installasi Windows.

Kali ini akan dibahas bagaimana cara me-repair ( memperbaiki) installasi Windows Xp.

Teknik Repair ini memiliki keunggulan seperti data-data yang ada di sistem masih tetap utuh ( program-program yang terinstall di komputer juga masih tetap). Dan hal itu juga akan mempersingkat waktu, karena jika install ulang maka program yang ada termasuk driver harus di install ulang lagi. Jika program yang ada sangat banyak, maka akan menghabiskan waktu cukup lama.

Tetapi meskipun demikian, Install ulang Windows biasanya akan lebih “segar” bagi komputer kita, apalagi jika sebelumnya drive di format dulu, sehingga windows benar-benar seperti bayi yang baru lahir.. :)

Kesalahan yang sering terjadi ketika ingin me repair Installasi Windows XP adalah ketika muncul pilihan / menu installasi pertama kali, kita memilih Repair Using Recovery Console, sehingga yang tampil adalah aplikasi/window Command Prompt. Memang fitur ini bisa digunakan untuk memperbaiki beberapa error, tetapi yang kita inginkan adalah memperbaiki keseluruhan file-file sistem windows XP bukan dengan command prompt.

Langkah-langkah me-repair Installasi Windows XP

  1. Sebelumnya menjalankan langkah dibawah, pastikan BIOS komputer di set agar urutan booting pertama kali adalah CDROM dan catat Serial Number Windows XP.
  2. Masukkan CD Intallasi Windows XP, kemudian restart (reboot) komputer.
  3. Ketika muncul tulisan “Press any key to boot from CD“, tekan sembarang tombol di keyboard.
  4. Windows Setup akan melanjutkan dengan me-load file-file yang diperlukan dari CD.
  5. Setelah itu akan tampil “Welcome to Setup“, maka tekan ENTER (pilihan pertama).
    repair-windows-xp-01
  6. Setelah itu akan tampil Windows XP Licensing Agreement
  7. Tekan tombol F8 ( I Agree ) untuk melanjutkan
  8. Windows Setup akan mencari apakah sudah ada Installasi Windows XP.
  9. Jika sudah ada Installasi Windows XP, maka akan ditampilkan dalam daftar. Jika tidak ada, maka tidak akan bisa me-repair Installasi Windows XP ( harus install ulang) Jangan diteruskan jika belum tahu.
  10. Setelah ditemukan, maka dipilih (select) Windows XP yang di inginkan dan tekan tombol R untuk me-repair Installas windows XP tersebut.
    repair-windows-xp-02
  11. Tunggu sampai selesai sampai komputer minta restart.
  12. Setelah restart, dan muncul menu Press any key to boot from CD maka jangan tekan tombol apapun. Ikuti kelanjutan proses repair sampai selesai.

Setelah selesai dan komputer restart, maka Installasi windows XP sudah berhasil di perbaiki, dan program/aplikasi yang sudah ada, driver hardware dan data akan tetap ada dan berjalan normal, tanpa perlu di install lagi. Kecuali aplikasi yang mengubah file sistem windows seperti Vista Transformation Pack dan sejenisnya. Kalau menggunakan aplikasi seperti ini maka perlu di install ulang (ebsoft.web.id)

Install 2 Windows XP dalam satu PC (Komputer)

Install 2 Windows XP

Mungkin masih banyak yang belum tahu jika kita bisa menginstall 2 Windows XP yang sama dalam satu PC (komputer). Misalnya di install di drive C: dan D:. Tetapi mengapa repot-repot install 2 Windows XP ? Ada beberapa manfaat yang bisa didapatkan ketika kita menginstall 2 Windows XP, meskipun juga ada kekurangannya.

Berikut akan dibahas secara singkat tentang Install 2 Windows XP dalam satu PC.

Manfaat yang bisa didapatkan dengan menginstall 2 Windows Xp dalam satu PC antara lain :

  • Untuk mencoba aplikasi atau software tertentu, misalnya ingin mencoba antivirus yang berbeda.
  • Install aplikasi dengan versi yang berbeda. Terkadang ada aplikasi dengan 2 versi yang berbeda tidak bisa di install dalam satu Windows, dilain pihak kita masih tetap memerlukan kedua versi tersebut.
  • Melakukan scan virus dari salah satu Windows. Jika windows yang satu terkena virus, maka kita memilih windows yang satunya dan discan dari sana. Meski tidak menutup kemungkinan dua-duanya terkena virus, tetapi biasanya virus hanya aktif di satu windows saja.
  • Sebagai alternatif jika salah satu windows bermasalah.
  • Melakukan berbagai pengujian /testing lainnya.
  • Memperbaiki jika satu windows tidak bisa booting.
  • Mencoba 2 versi windows XP yang berbeda, misalnya Home Edition dan Professional Edition.

Meskipun begitu, tetap saja ada kekurangannya, antara lain :

  • Menambah penggunaan hardisk space (drive)
  • Mengulangi Installasi program/aplikasi, update, driver dan lainnya.

Meskipun sebagian cara diatas bisa juga menggunakan software Virtualisasi, seperti VirtualBox , tetapi dengan virtualisasi kinerja tidak akan maksimal dan akan tergantung dengan software virtualisasi sendiri.

Ketika menginstall 2 Windows XP dalam satu komputer, maka sebaiknya windows kedua tidak di install dengan berbagai macam program/aplikasi, mungkin hanya driver standard, antivirus dan beberapa aplikasi penting lainnya, sehingga kinerjanya ringan. Sedangkan satunya lagi bisa di install berbagai macam, dan ini mungkin yang dijadikan Sistem operasi utama.

Cara Install Windows XP Kedua

Sebelum menginstall, siapkan partisi yang kosong terlebih dahulu. Jika windows yang satu sudah di install ada di drive C:, maka bisa menggunakan drive lainnya, misalnya drive D: atau drive yang lainnya. Pastikan data-data sudah diamankan terlebih dulu.

Karena Windows XP kedua tidak akan digunakan untuk banyak aplikasi/program, maka ukuran Drive juga tidak perlu terlalu besar, mungkin sekitar 5 GB saja sudah cukup. Atau itu juga terserah kebutuhan kita saja.

Proses Installasi seperti install windows biasa, yaitu :

  1. Set Booting pertama kali BIOS di CDROM
  2. Masukkan CD master windows XP dan restart komputer
  3. begitu muncul menu “Press any key to boot from CD”, tekan sembarang tombol
  4. Tunggu proses Setup me-load file-file yang diperlukan, selanjutnya akan tampil pilihan Install, dan tekan ENTER (To set up Windows XP now, press ENTER)
    windows-setup
  5. Akan tampil License Agreement, tekan F8
  6. Ketika muncul tampilan berikut, pilih ESC
    windows-setup-02
  7. Maka akan ditampilkan pilihan Drive yang ada di hardisk. Pilih drive yang akan di install Windows XP kedua ini. Lalu tekan Enter.
    windows-setup-select-part
  8. Selanjutnya ikuti proses Installasi sampai selesai, yang memerlukan waktu sekitar 30 menit atau lebih.

BOOT.INI

Setelah selesai, maka ketika booting akan ditampilkan dua pilihan Windows, seperti berikut ( awalnya akan ditampilkan 2 pilihan yang sama, misalnya “Microsoft Windows XP Home Edition”):

windows-booting-select

Agar lebih mudah dan tidak membingungkan, maka kita bisa mengganti nama pilihan tersebut dengan mengedit file boot.ini yang (biasanya) ada di drive C: ( file ini beratribut Hidden System, jadi munculkan file Hidden system terlebih dulu ).

Buka file boot.ini dengan notepad atau text editor lainnya, akan terlihat baris seperti berikut:


[boot loader]
timeout=10
default=multi(0)disk(0)rdisk(0)partition(1)\WINDOWS
[operating systems]
multi(0)disk(0)rdisk(0)partition(7)\WINDOWS=”Microsoft Windows XP Lite” /noexecute=optin /fastdetect
multi(0)disk(0)rdisk(0)partition(1)\WINDOWS=”Microsoft Windows XP Home Edition” /noexecute=optin /fastdetect

Pilihan yang muncul ketika booting adalah apa yang tertera dalam tanda petik diatas. Jadi berdasarkan kode tersebut, di tampilan booting akan ada 2 pilihan seperti diatas.

Jika dipilih “Microsoft Windows XP Lite”, maka windows yang akan aktif adalah yang di install di Partition(7) dan juga sebaliknya. Nilai timeout=10 berarti jika selama 10 detik kita tidak memilih maka otomatis komputer akan booting dengan pilihan yang ada di nilai default. Masing-masing bisa diubah dan disesuaikan.

Peringatan : Pastikan hanya mengubah text yang ada didalam tanda petik saja, nilai timeout dan nilai default. Jangan mengubah nilai lainnya jika tidak tahu apa maksudnya. Kemudian, text “multi(0)disk(0)rdisk(0)partition(7)\WINDOWS=”Microsoft Windows XP Lite” /noexecute=optin /fastdetect” dan baris bawahnya harus ada dalam satu baris. Karena jika terjadi kesalahan bisa berakibat windows tidak bisa booting. Dan sebelum mengubah, pastikan dibuat copy file boot.ini agar jika terjadi kesalahan bisa dikembalikan ke keadaan semula.